Contents12 sections
This guide was first published in German on handgetestet.de.
Before you order a sensor, take a flashlight to the meter. If the rating plate shows a figure such as „0.01 m³/imp.“, it is prepared for a pulse sensor, and in our view the Homematic IP Schnittstelle für Gaszähler HmIP-ESI-GAS (gas meter interface) is the shortest route to your gas consumption in the app. If the figure is missing, you are left with a camera or magnetic field sensor, meaning DIY work. None of these solutions requires anyone to touch the gas line.
A small magnet does the work
According to eQ-3, most households have a diaphragm gas meter, the familiar housing with the roller counter. In many models, one of the counter rolls contains a magnet. Each revolution triggers a reed contact in the sensor without contact, and that produces a pulse.
Which roll it is, is indicated by a circled number on the meter. ELV explains this using Pipersberg as an example: a circled 2 stands for the second decimal place, and one revolution equals 0.1 m³. With a circled 1, it is the third place, at 0.01 m³.
The manufacturer has to match, too. Compatible meters are those from Elster (Kromschröder, Honeywell), Itron (Pipersberg, Actaris) and Metrix with a module slot. For Elster, ELV only lists the BK-G models. The Pipersberg „c“ series, such as the G4 RF1 c, is ruled out: there is no magnet in its counter.
Six ways to get a reading
| Model | Principle | Power | Connection | Best for |
|---|---|---|---|---|
| Homematic IP Schnittstelle für Gaszähler HmIP-ESI-GAS | reed sensor plus radio module | 2 AA, typically over 7 years | Access Point or CCU3 | prepared meters, no tinkering |
| Homematic IP Access Point 2 HmIP-HAP2 | hub for the app | power adapter | router, cloud | those who do not have Homematic IP yet |
| ELV Energy-Sensor Gas 2 ES-GAS-2 | reed sensor only | via evaluation unit | e.g. ELV-LW-ESI, LoRaWAN | those who already have the evaluation unit |
| Shelly Plus Uni | pulse input, sensor sold separately | 9 to 28 V DC | Wi-Fi | tinkerers with power at the meter |
| ESP32-CAM | camera reads the digits | continuous power | Wi-Fi, MQTT | meters without a magnet |
| GY-271 magnetometer | measures the magnetic field at the diaphragm | via ESP board | ESPHome | Home Assistant users with patience |
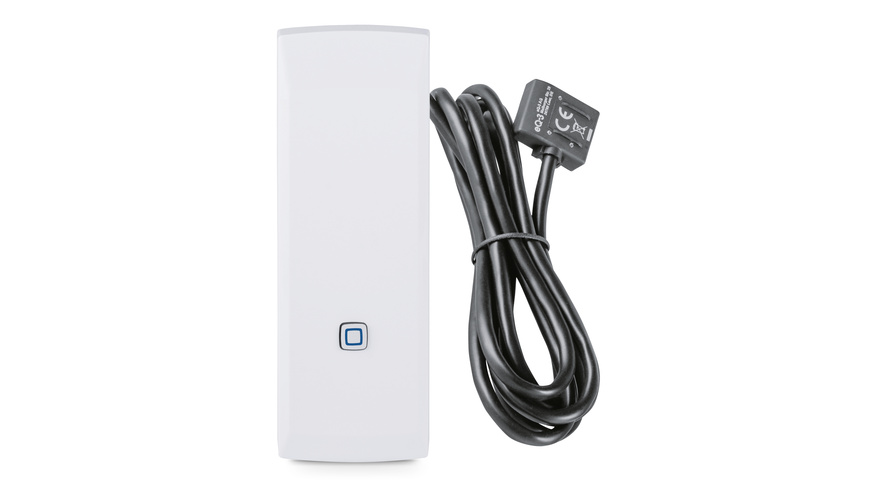
Homematic IP Schnittstelle für Gaszähler HmIP-ESI-GAS
The set contains the radio module, the ES-GAS-2 sensor and three adapters. It runs on batteries, so no outlet is needed in the basement, and records the history in the app; export as CSV is provided for. Two limitations: nothing works without an Access Point or CCU3, and a value typically arrives every six minutes. That is enough for the daily curve. It will not show you whether the boiler is firing up right now.
Homematic IP Access Point 2 HmIP-HAP2
Mandatory for the app solution if there is no hub in the house. According to ELV, it manages up to 120 devices via the Homematic cloud. If you prefer to keep the data local, go with the CCU3.
ELV Energy-Sensor Gas 2 ES-GAS-2
Just the sensor, with cable and adapters. On its own, it transmits nothing. It is connected to the ELV kit LoRaWAN-Energiezähler ELV-LW-ESI (LoRaWAN energy meter), which also supplies it with power. This is something for tinkerers with LoRaWAN access.
Shelly Plus Uni
According to Shelly, the module has a pulse counter input and reports via Wi-Fi. The sensor is not included, and it needs a low-voltage power supply. In a basement without an outlet and Wi-Fi, this solution is out.
ESP32-CAM
The camera photographs the counter, the free software AI-on-the-edge reads the digits and passes them on to Home Assistant. This also works without a magnet in the meter. The developers warn, however, that boards that look identical can differ considerably and that choosing one is sometimes a matter of trial and error.
GY-271 magnetometer
Home Assistant describes another route: the movement in a diaphragm gas meter can often be detected with a magnetometer; the QMC5883L and HMC5883L chips are supported. That means soldering, flashing, calibrating. Check beforehand which chip is on the board.
Installation: attach on the outside, nothing else
The adapter clicks into the designated opening on the counter; with Elster, a screw is added. The radio module is attached to the wall with adhesive strips or a screw. In the app, you enter the pulse constant and the current meter reading; according to eQ-3, this starting value must be entered again after a battery change.
Fittings and the line remain untouched. If a cover on the slot cannot be removed without force, or if it is sealed, keep your hands off it and ask the metering point operator. The meter belongs to the metering operation and is the basis of your bill.
Two pitfalls. The sensor and radio module are designed for 5 to 35 degrees and protection class IP20, which rules out a meter in an outdoor cabinet. And in the reviews at ELV, one buyer describes that counting only worked without the adapter; test the fit while the heating is running. Incidentally, a consumption sensor is no substitute for a warning device: that is what the gas detector is for.
Turning cubic meters into kilowatt hours
The sensor counts cubic meters, the bill shows kilowatt hours. The Verbraucherzentrale (German consumer advice center) recommends multiplying by ten as a rule of thumb. The Bundesnetzagentur (Germany’s Federal Network Agency) calculates it exactly like this: cubic meters times calorific value times correction factor. The local network operator publishes the calorific value for each month; the correction factor is shown on your bill.
What does the curve tell you? You can see what a nighttime setback actually saves, how much hot water alone uses in summer and whether the increased advance payment (in German) matches your consumption. If you want to change something afterward, you will find approaches in the guide to smart boiler control. There are similar readers for the electricity meter; see energy meter.
Billing continues to be based on the counter; your sensor is only a private secondary display. According to the Bundesnetzagentur, the smart meter (in German) initially concerns electricity only.
Which route suits which basement
- Pulse constant on the plate, Homematic IP already in place: HmIP-ESI-GAS.
- Same, but no hub yet: HmIP-ESI-GAS plus Access Point 2. For gas alone, that is a lot of effort.
- No magnet, Home Assistant running: ESP32-CAM, provided there is power and Wi-Fi at the meter.
- Meter in an outdoor cabinet or only a monthly value wanted: write down the reading; it costs nothing.
With the annual consumption you have read, you can also check your tariff; how switching works is explained in the guide Switching gas providers.
Frequently asked questions
How can I tell whether my gas meter has a pulse output?
The rating plate will then show a figure such as 0.01 m³/imp. In many diaphragm gas meters, one of the counter rolls contains a magnet, indicated by a circled number. Compatible meters are those from Elster, Itron and Metrix with a module slot. The Pipersberg c series is ruled out, as it has no magnet.
Do I need a hub for the HmIP-ESI-GAS?
Yes. Nothing works without an Access Point or CCU3. If you do not have Homematic IP yet, you will also need the Access Point 2, which works via the Homematic cloud. If you prefer to keep the data local, go with the CCU3. Typically, a value arrives every six minutes.
Can I read a gas meter without a magnet?
Yes, with some DIY work. An ESP32-CAM photographs the counter, the free software AI-on-the-edge reads the digits and passes them on to Home Assistant. Another route is a magnetometer such as the GY-271 with ESPHome. Both need power and usually Wi-Fi at the meter.
Am I allowed to attach the sensor to the gas meter myself?
The adapter clicks into the designated opening on the outside of the counter; fittings and the line remain untouched. If a cover cannot be removed without force or is sealed, ask the metering point operator. The meter belongs to the metering operation and is the basis of your bill.
How do I convert cubic meters of gas into kilowatt hours?
The Verbraucherzentrale (German consumer advice center) recommends multiplying by ten as a rule of thumb. For an exact calculation, the Bundesnetzagentur (Germany's Federal Network Agency) multiplies cubic meters by the calorific value and the correction factor. The local network operator publishes the calorific value for each month; the correction factor is shown on your bill.
Does the sensor work on a meter in an outdoor cabinet?
No. The sensor and radio module of the Homematic solution are designed for 5 to 35 degrees and protection class IP20, which rules out a meter in an outdoor cabinet. If you only need a monthly value there, write down the reading by hand; it costs nothing.
Sources
- ELV: Homematic IP Schnittstelle für Gaszähler
- eQ-3: HmIP-ESI-GAS manual (PDF)
- eQ-3: energy interfaces guideline (PDF)
- ELV: Energy-Sensor Gas 2
- ELV: information on the Pipersberg gas meter (PDF)
- ELV: Homematic IP Access Point 2
- Shelly: Plus Uni
- Home Assistant: integrating gas consumption
- AI-on-the-edge: hardware
- Bundesnetzagentur: bills
- Bundesnetzagentur: calorific value
- Bundesnetzagentur: metering devices and meters
- Verbraucherzentrale: checking bills and advance payments
Where to buy
- Homematic IP Schnittstelle für Gaszähler HmIP-ESI-GASView at ELVAvailable in Germany: ELVCheck price at Amazon.deCheck price at Amazon.co.ukCheck price at Amazon.nlCheck price at Amazon.com.beCheck price at Amazon.frCheck price at Amazon.itCheck price at Amazon.esCheck price at Amazon.plCheck price at Amazon.seAvailable in Germany: Amazon.de
- Homematic IP Access Point 2 HmIP-HAP2View at ELVAvailable in Germany: ELVCheck price at Amazon.deCheck price at Amazon.co.ukCheck price at Amazon.nlCheck price at Amazon.com.beCheck price at Amazon.frCheck price at Amazon.itCheck price at Amazon.esCheck price at Amazon.plCheck price at Amazon.seAvailable in Germany: Amazon.de
- ELV Energy-Sensor Gas 2 ES-GAS-2View at ELVAvailable in Germany: ELV
- Shelly Plus UniCheck price at Amazon.deCheck price at Amazon.co.ukCheck price at Amazon.nlCheck price at Amazon.com.beCheck price at Amazon.frCheck price at Amazon.itCheck price at Amazon.esCheck price at Amazon.plCheck price at Amazon.seAvailable in Germany: Amazon.de
- ESP32-CAMCheck price at Amazon.deCheck price at Amazon.co.ukCheck price at Amazon.nlCheck price at Amazon.com.beCheck price at Amazon.frCheck price at Amazon.itCheck price at Amazon.esCheck price at Amazon.plCheck price at Amazon.seAvailable in Germany: Amazon.de
- GY-271 MagnetometerCheck price at Amazon.deCheck price at Amazon.co.ukCheck price at Amazon.nlCheck price at Amazon.com.beCheck price at Amazon.frCheck price at Amazon.itCheck price at Amazon.esCheck price at Amazon.plCheck price at Amazon.seAvailable in Germany: Amazon.de